First Project – Complete!
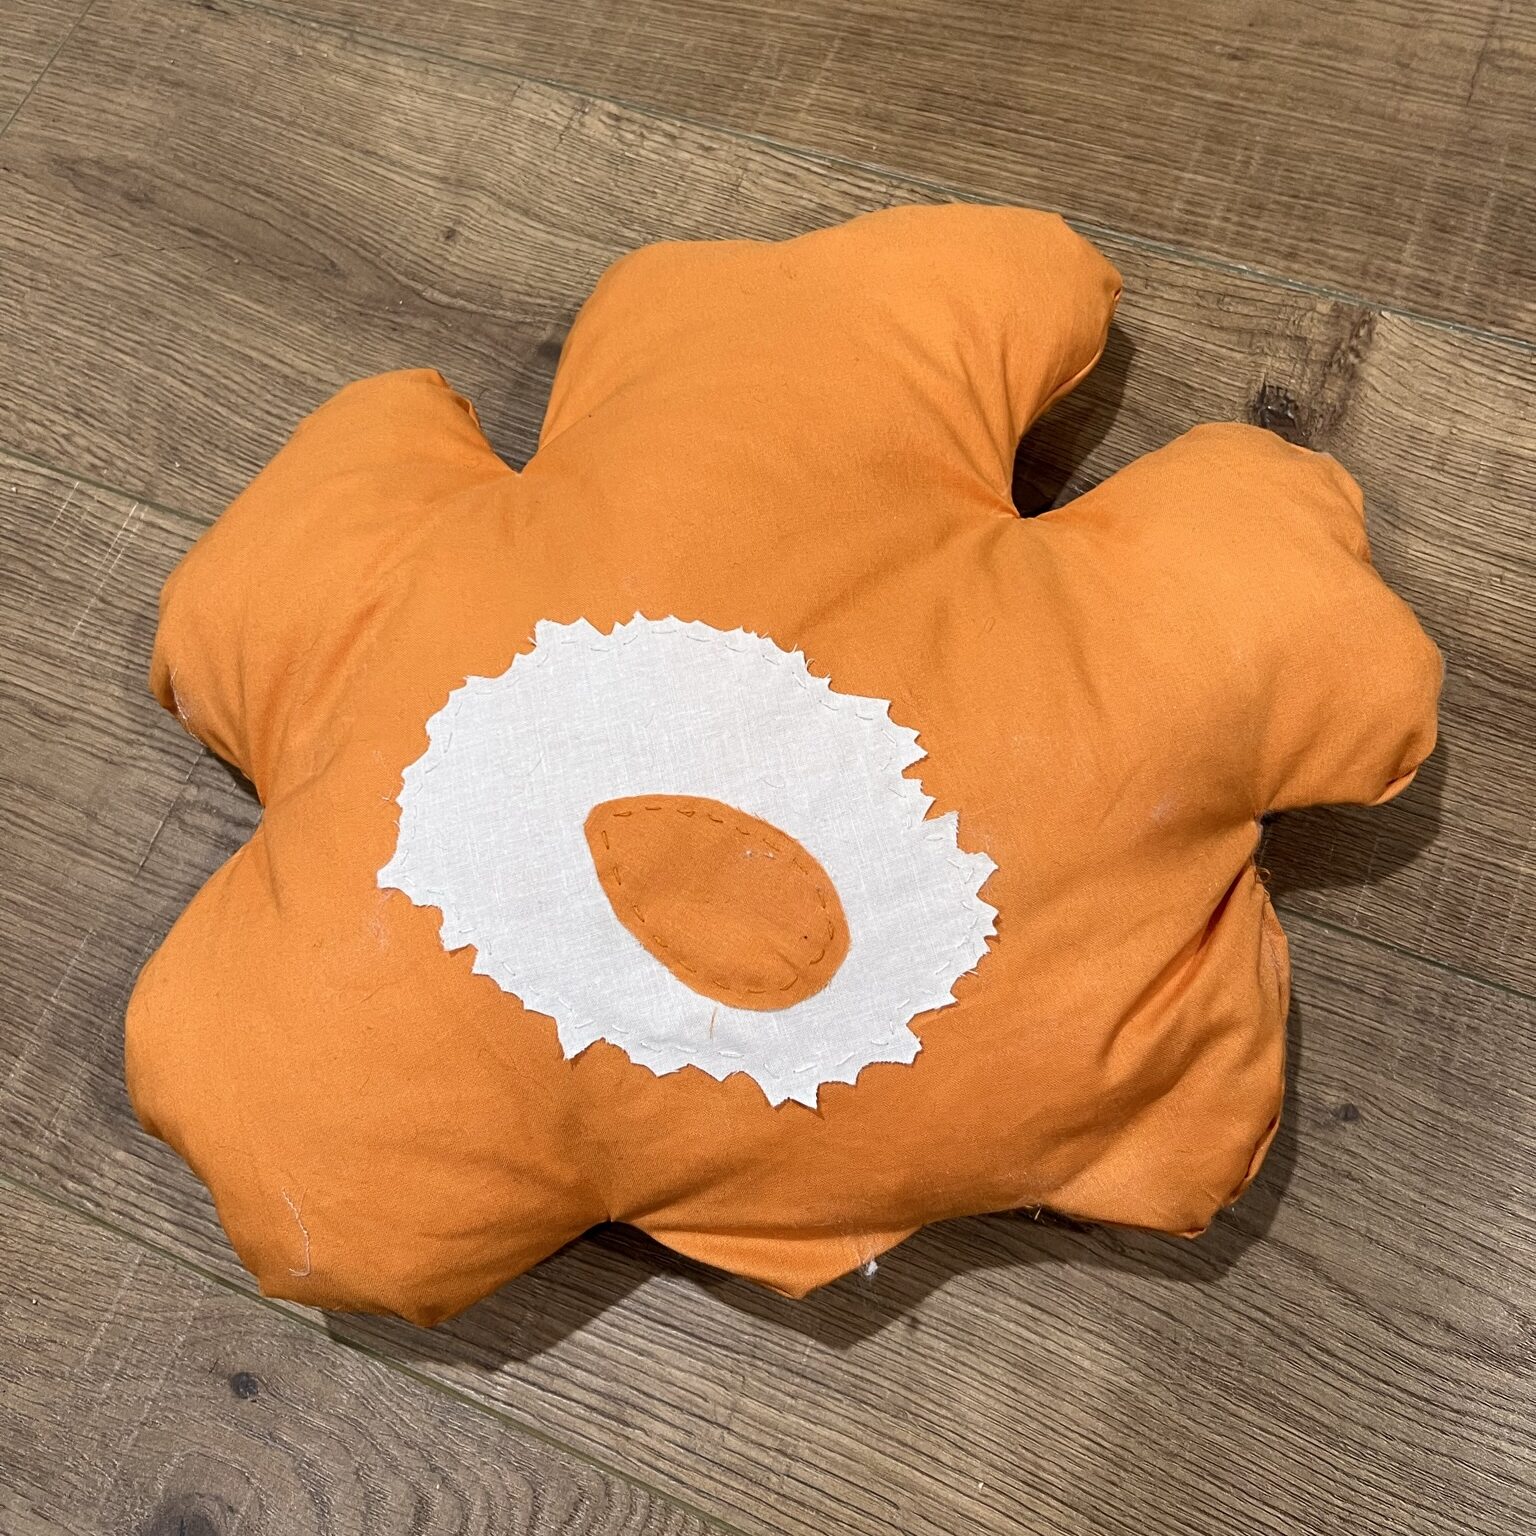
I can’t describe how satisfying it feels to have finally finished my first ever full-scale project, especially after years of only watching creators on YouTube. This Marimekko-inspired flower pillow might have been a bit more than I could chew for my first hand sewn project because I made quite a few mistakes, but the journey taught me a lot that I’m more than happy to pass on to you all.
The bulk of the instructions for this project come from Pillar Box Blue, but I’ll be making some slight modifications here and there. If you’d like to follow along and make one of these pillows yourself, I highly recommend checking out my post on the basic tools and skills you’ll need to start hand sewing. This pillow could serve as a great housewarming gift or couch decoration.
Pattern & Design Analysis
Before we jump in, I wanted to first analyze the history and design of the Marimekko unikko design (poppy).
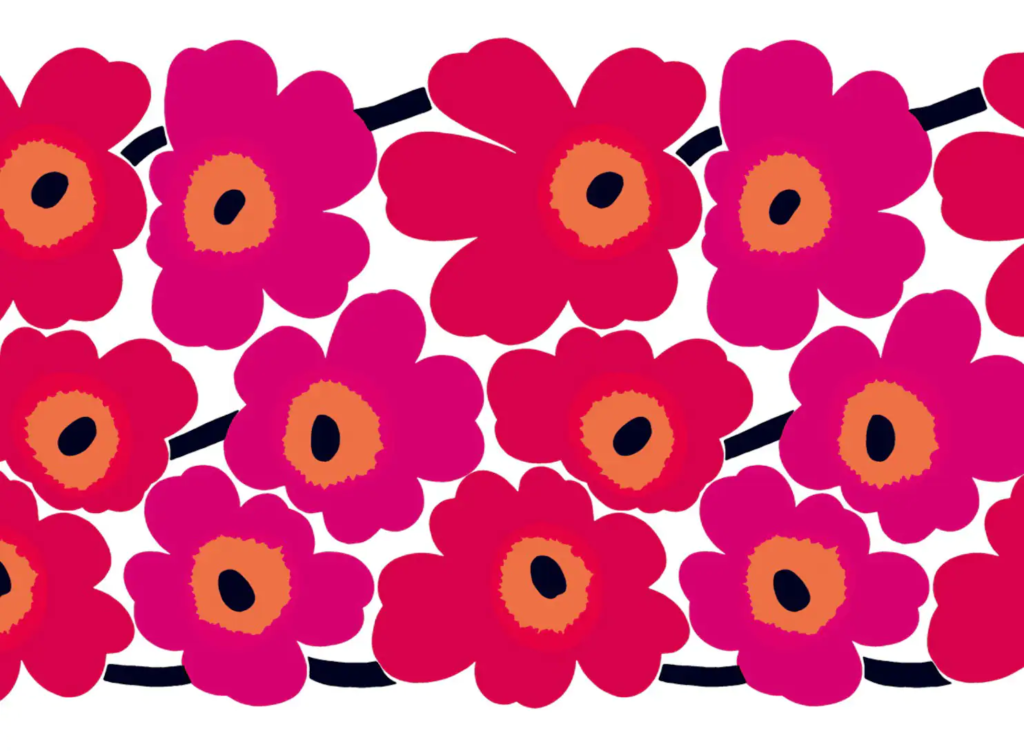
Marimekko is a Finnish design company founded in 1951 that has become known for its bold use of color and graphic prints in textiles and home goods. One of the most recognizable designs by Marimekko is the Unikko (poppy) pattern, designed by Maija Isola in 1964. The large-scale print featuring bright red poppies on a white background quickly became popular and remains an iconic symbol of the brand today. Marimekko’s designs have been used in various forms of media, including fashion, and have had a lasting impact on the world of design. The company continues to produce new designs while also staying true to its heritage and preserving its classic patterns, including the beloved Unikko.
To ensure I was doing the design justice, I took note of a few key characteristics of the flower that I wanted to preserve:
- Assymmetric design – the center of the flower is often offset, and the petals of the flower form an amorphous shape (as opposed to a strict circle)
- Six petals – there are always six petals, and always a small valley in the middle of each no matter how small the petal may be
- Each petal is also connected to the petals next to it, rather than being depicted as a separate entity
- High contrast – the portion of the petals closer to the center of the flower is represented in a color that contrasts sharply with the primary petal colors
- In monochromatic versions of the design, the petals and center of the flower share the same color, while the circular area is simply left white
- Inverted curves – the circular area surrounding the center of the flower is composed of inverted curves bending inward, leaving sharp corners facing outward
Following this mini-study, I went into Procreate and did my best to draw up a flower shape I liked that had the design elements listed above.
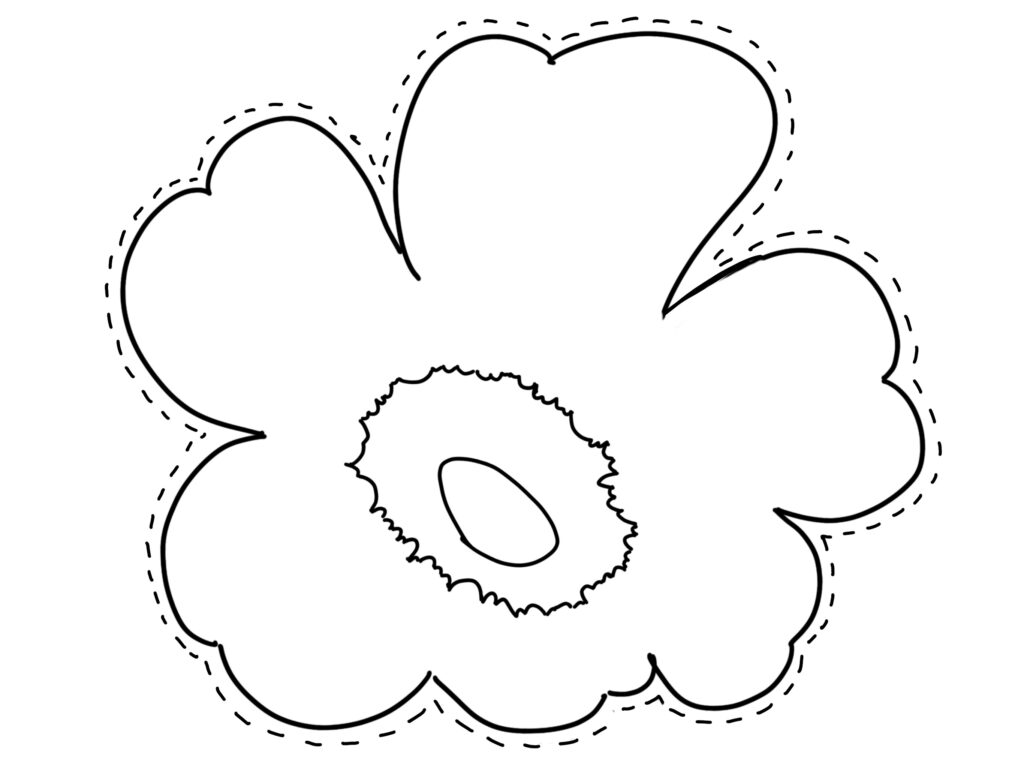
I highly recommend trying to draw your own flower as a way to get creative! If you’d like to use the one I designed, you can access the pattern here.
Difficulty
As someone who had absolutely zero hand sewing project experience before this, I’d probably rate this as an intermediate project. Definitely doable, but I wish I had invested a bit more practice into certain skills (or if I were to be honest with myself, almost all of them) prior to jumping in headfirst. Don’t let that stop you from giving this a try as a beginner though!
From start to finish, this project took me about 6 hours, not including the additional hour I spent wandering the aisles of Joann trying to look like I knew what I was doing.
Flower Pillow: Tools and Materials
What you’ll need:
- Scissors
- Needle
- Thread (preferably in the same color as your fabric)
- Pins (extra needles also work)
- Paper to print/draw the pattern on
- 1/2 yard of fabric for the main body and contrasting scraps for the center of the flower (I got 1/4 yard and was left with plenty)
- Pillow stuffing
- (Optional) Fabric chalk
If you’re following along with the Pillar Box Blue instructions, note that I did not include fabric glue or quilt batting in the list above – I wanted to keep things as simple as I could for my first project.
Instructions
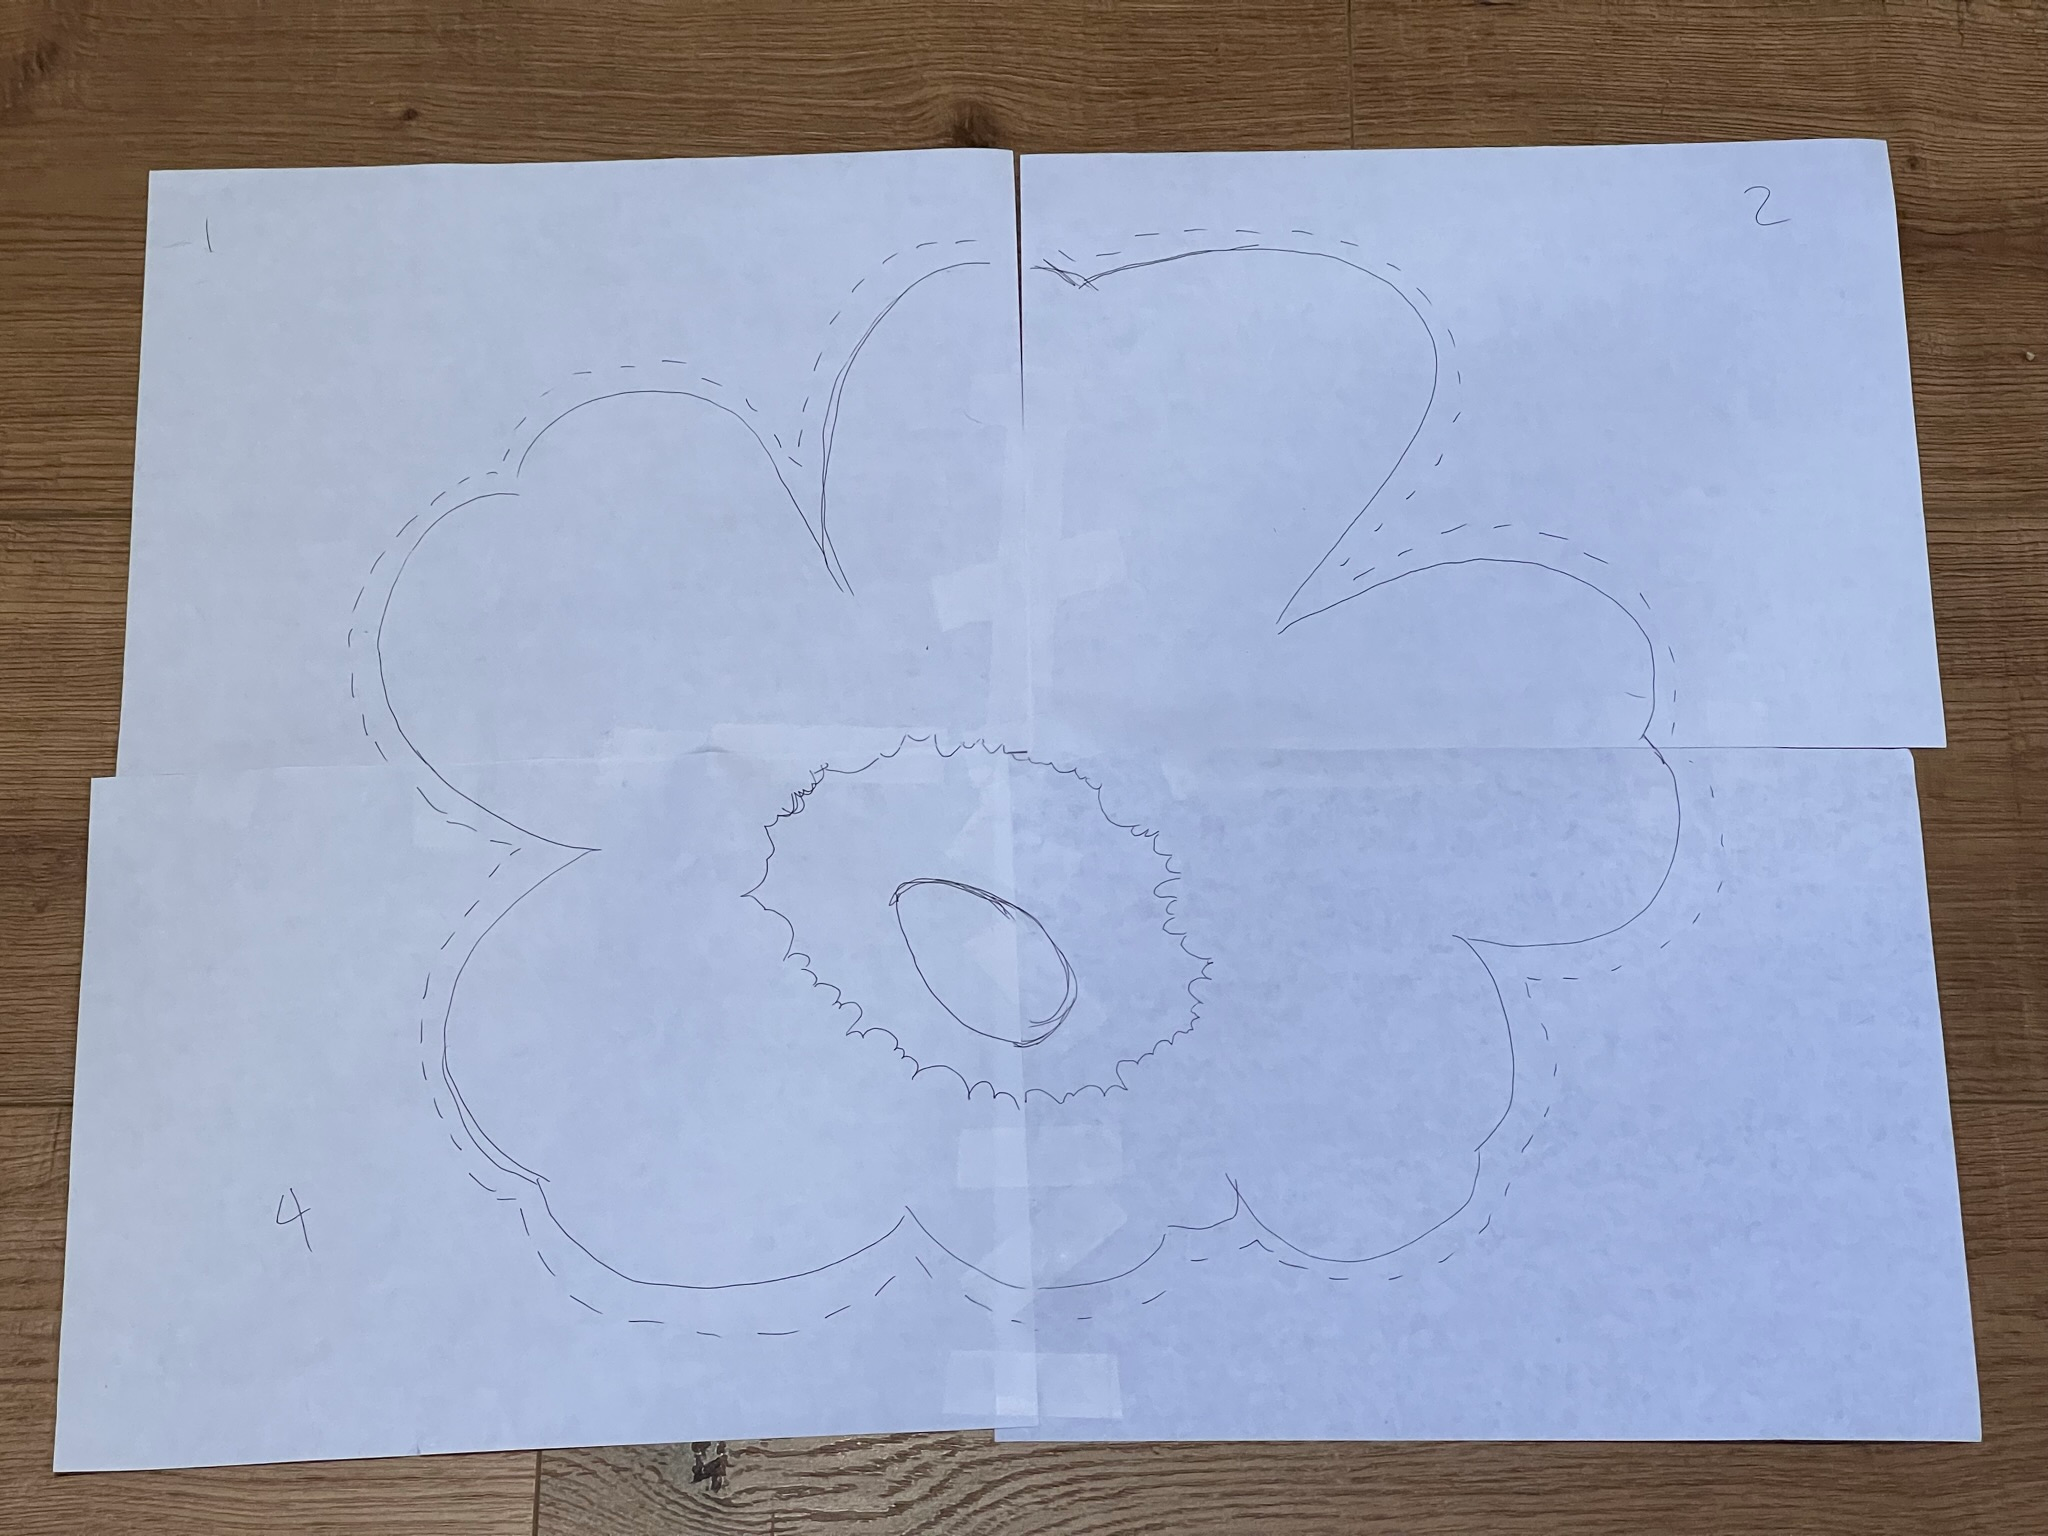
Step 1: Draw or print your pattern. I personally drew my own design on my iPad, then traced the pattern across four taped sheets of printer paper (I don’t own a printer).
If you’re drawing your own pattern, it helps to also add a roughly quarter-inch (1 cm) border to the outside edge of your flower. This will act as your seam allowance.
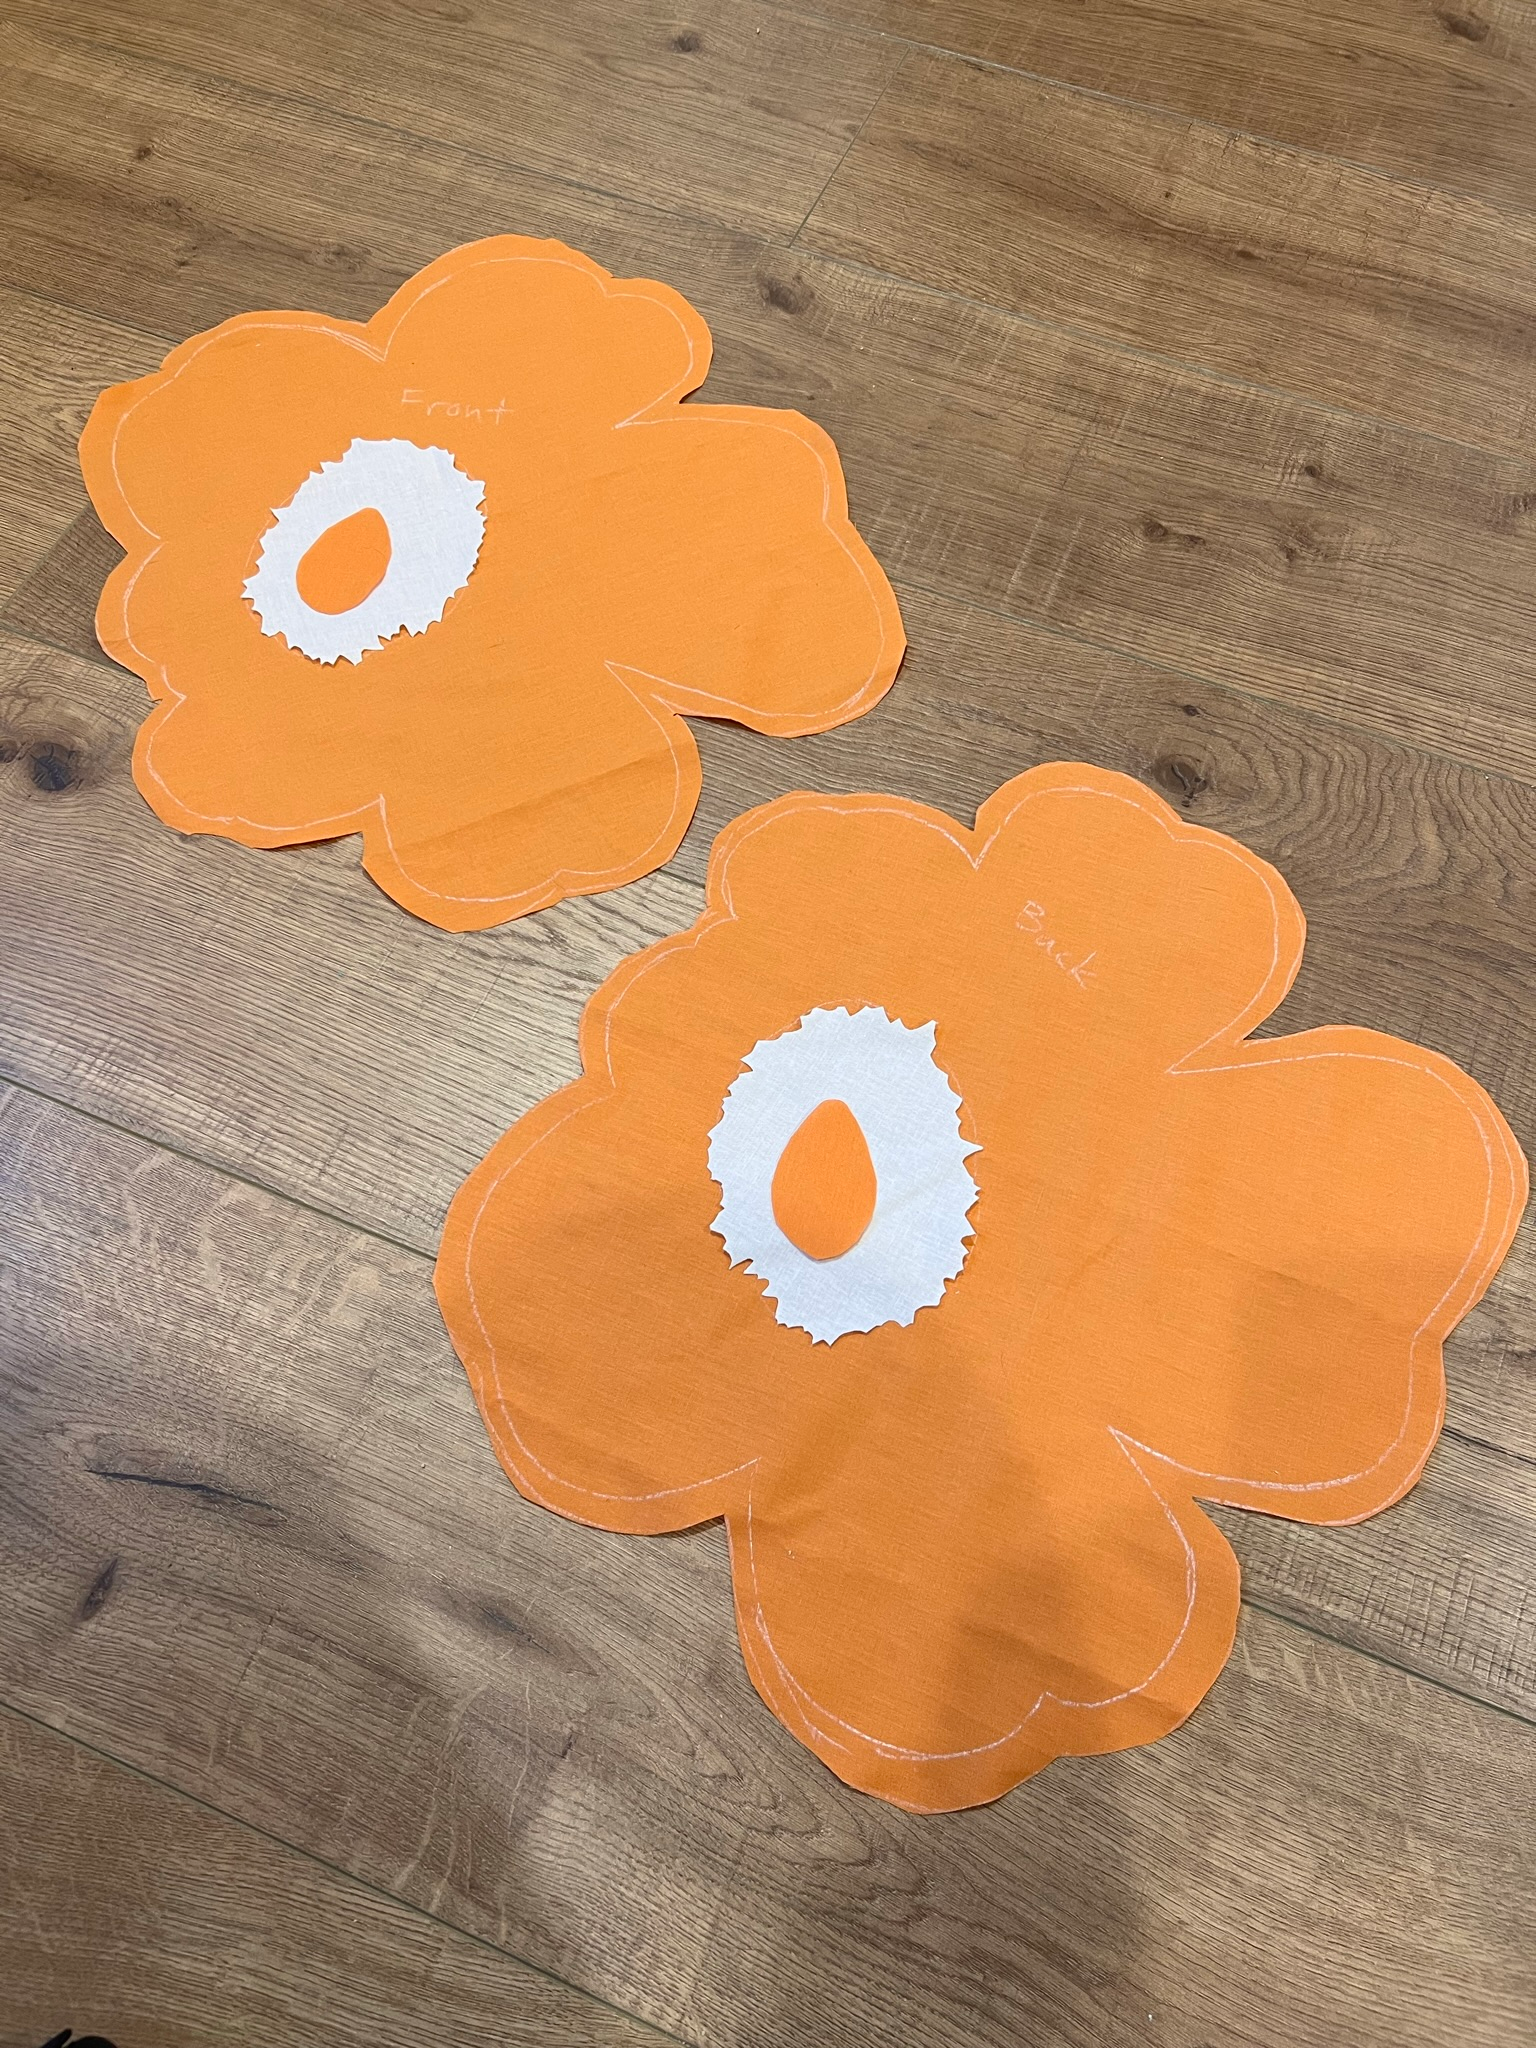
Step 2: Trace your pattern and cut the fabric
- Main body (front): Cut the pattern out of the paper, then trace it onto the right side of your fabric with some fabric chalk. If you didn’t incorporate the seam allowance into your pattern, be sure to leave some room between the pattern and your trace path. While you can do without the chalk, it may be difficult to cut the fabric with the pattern attached.
- Main body (back): Flip your pattern, and now on a separate portion of the fabric, trace it again (being sure to include the seam allowance). This will be the back side of the pillow.
- Centermost dot: Cut the centermost dot out of your paper pattern and trace it onto the same fabric, in a different spot. (2x if you want the pillow to be reversible)
- Larger center circle: Cut the larger center circle out of your paper pattern and trace it onto contrasting fabric. (2x if you want the pillow to be reversible)
- Don’t worry about capturing every curve of the pattern – as long as you generally have a few inverted curves, you’ll be fine
- Cut along the trace paths on your fabric.
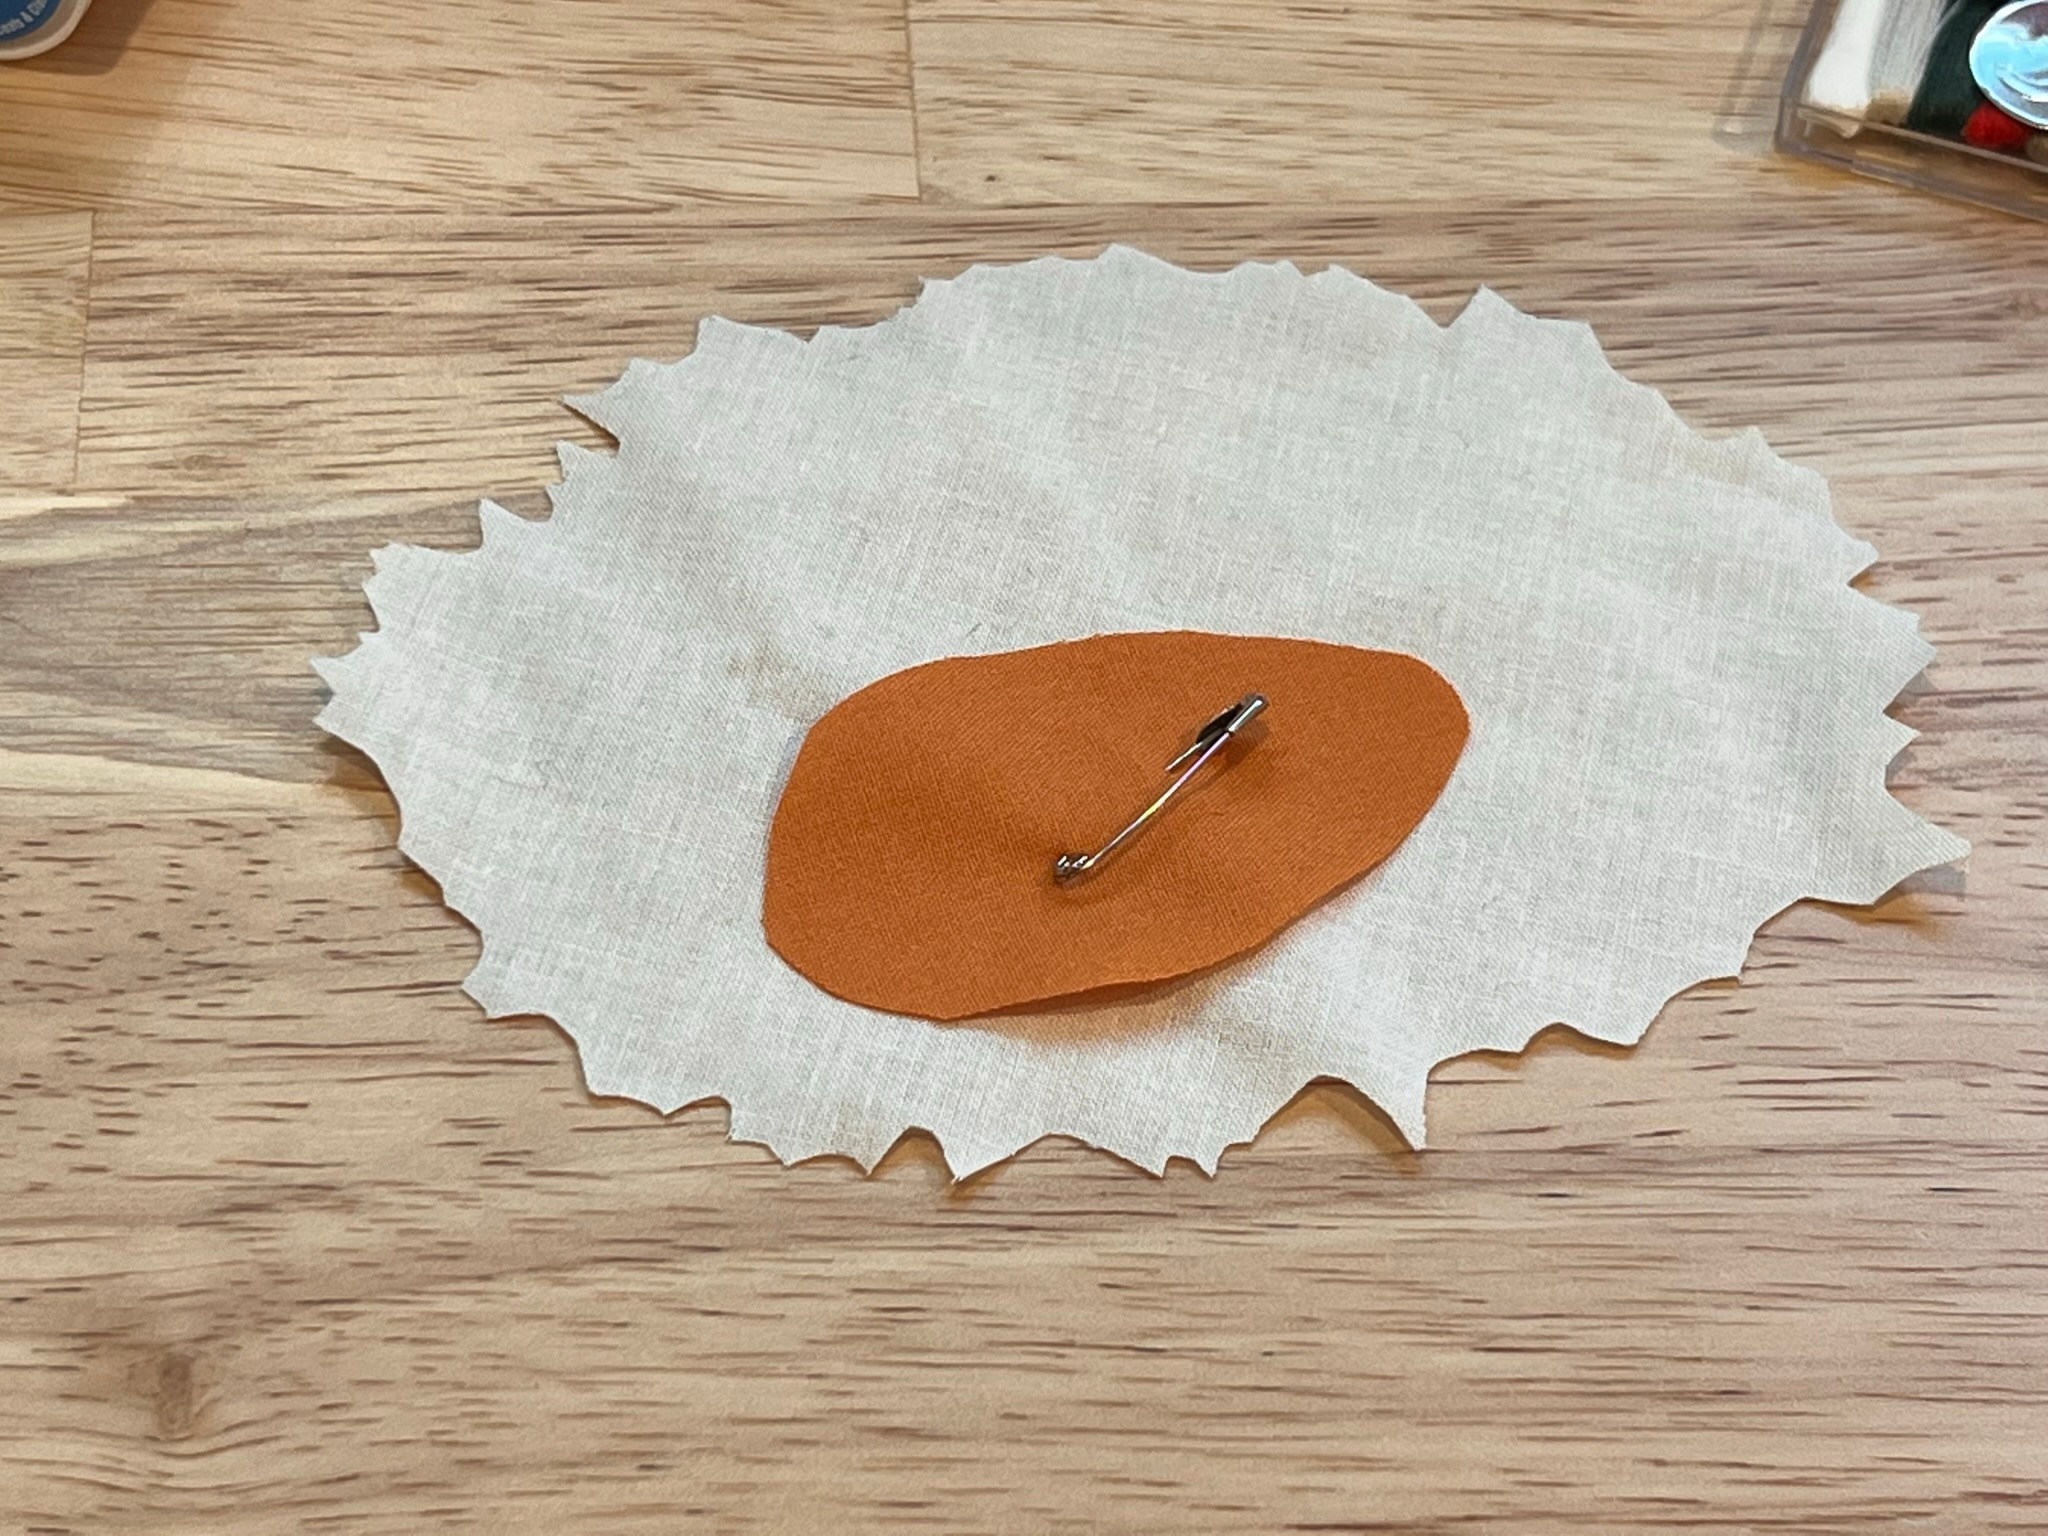
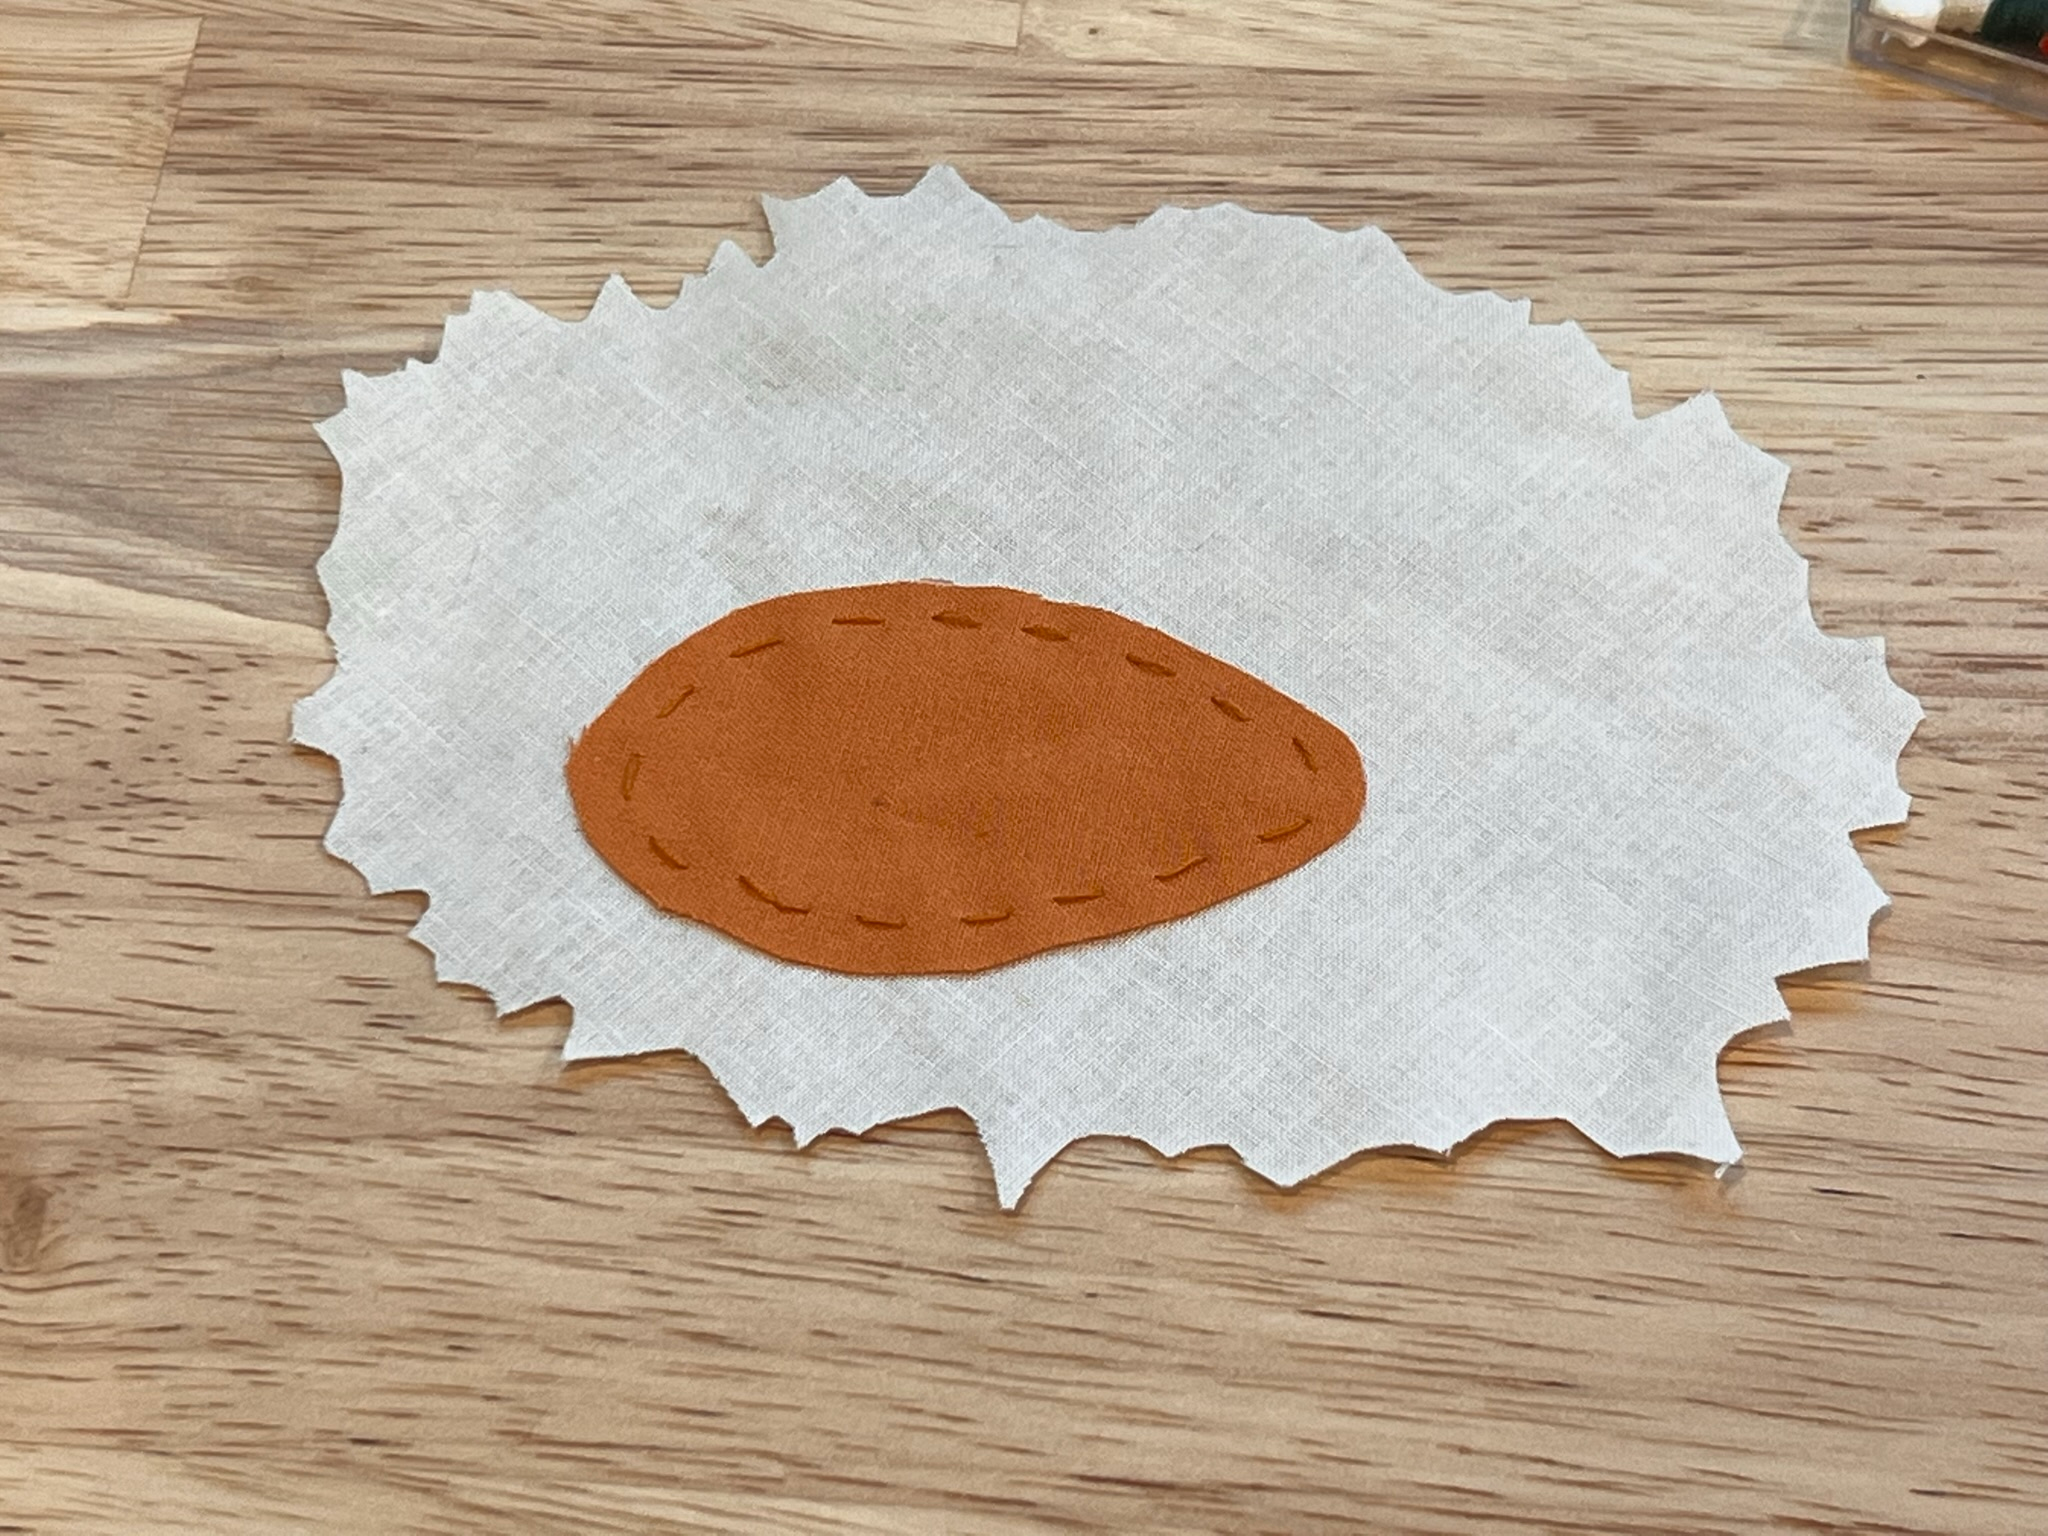
Step 3: Attach the centerpieces
- Stitch the centermost dot onto the larger center circle using a running stitch.
- Once stitched, take the combined piece and attach it to the right side of the main body (front). The centermost dot should face outward and still be visible once attached.
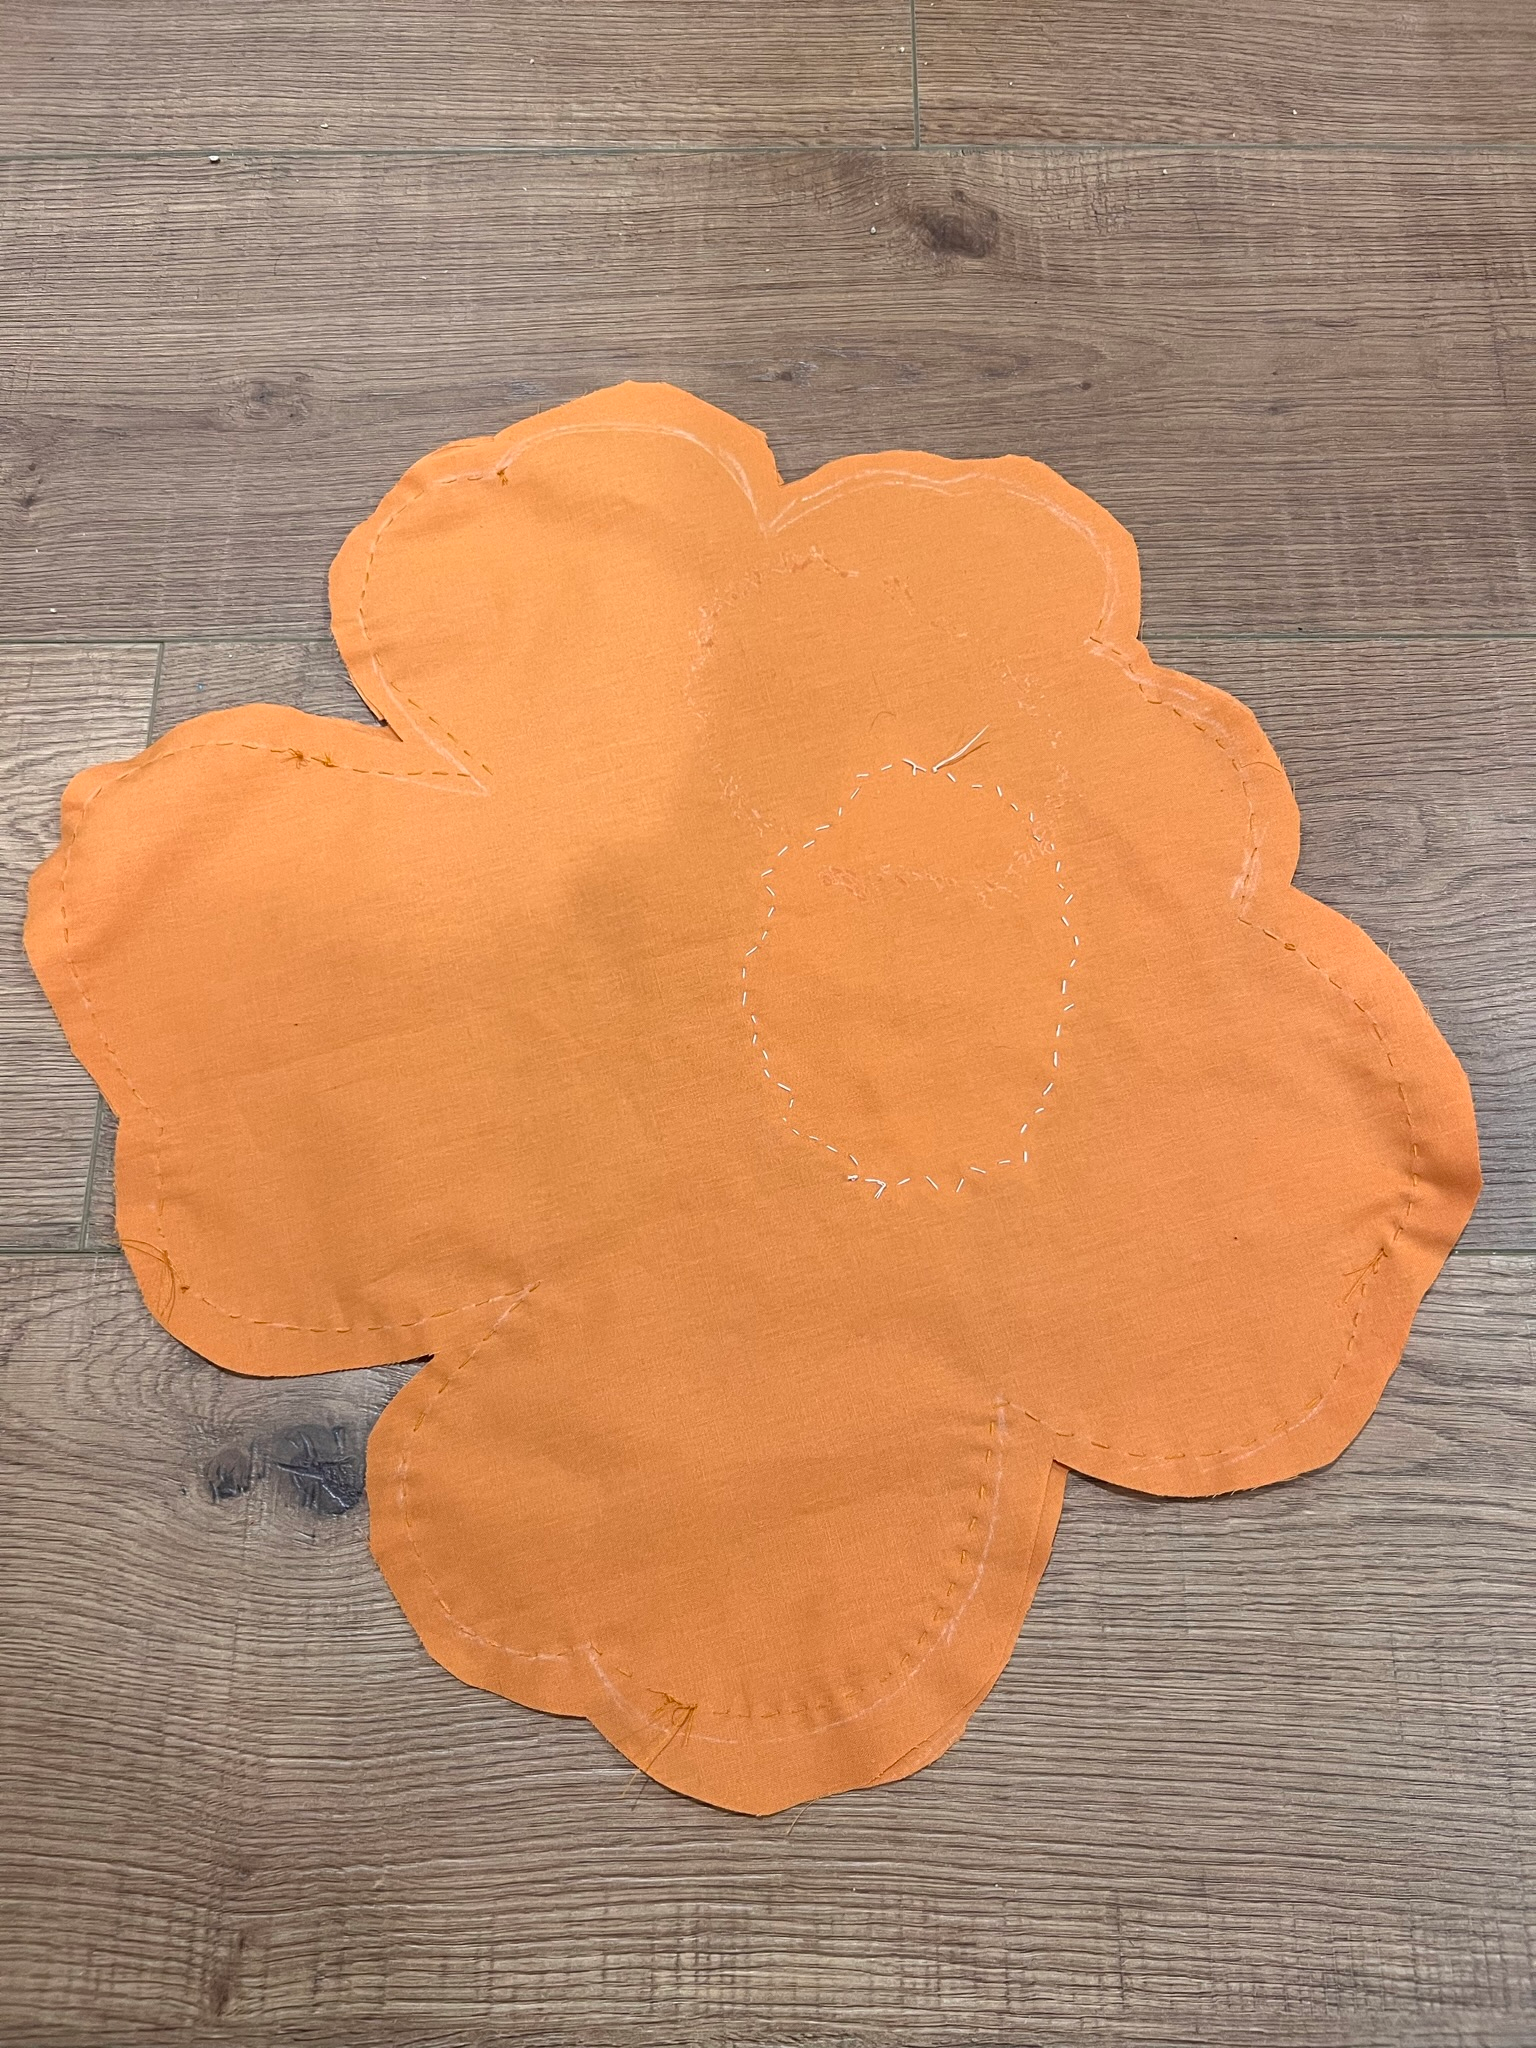
Step 4: Pin and sew
- We want the stitch to be hidden, so secure the main body faces with the right sides facing each other using pins.
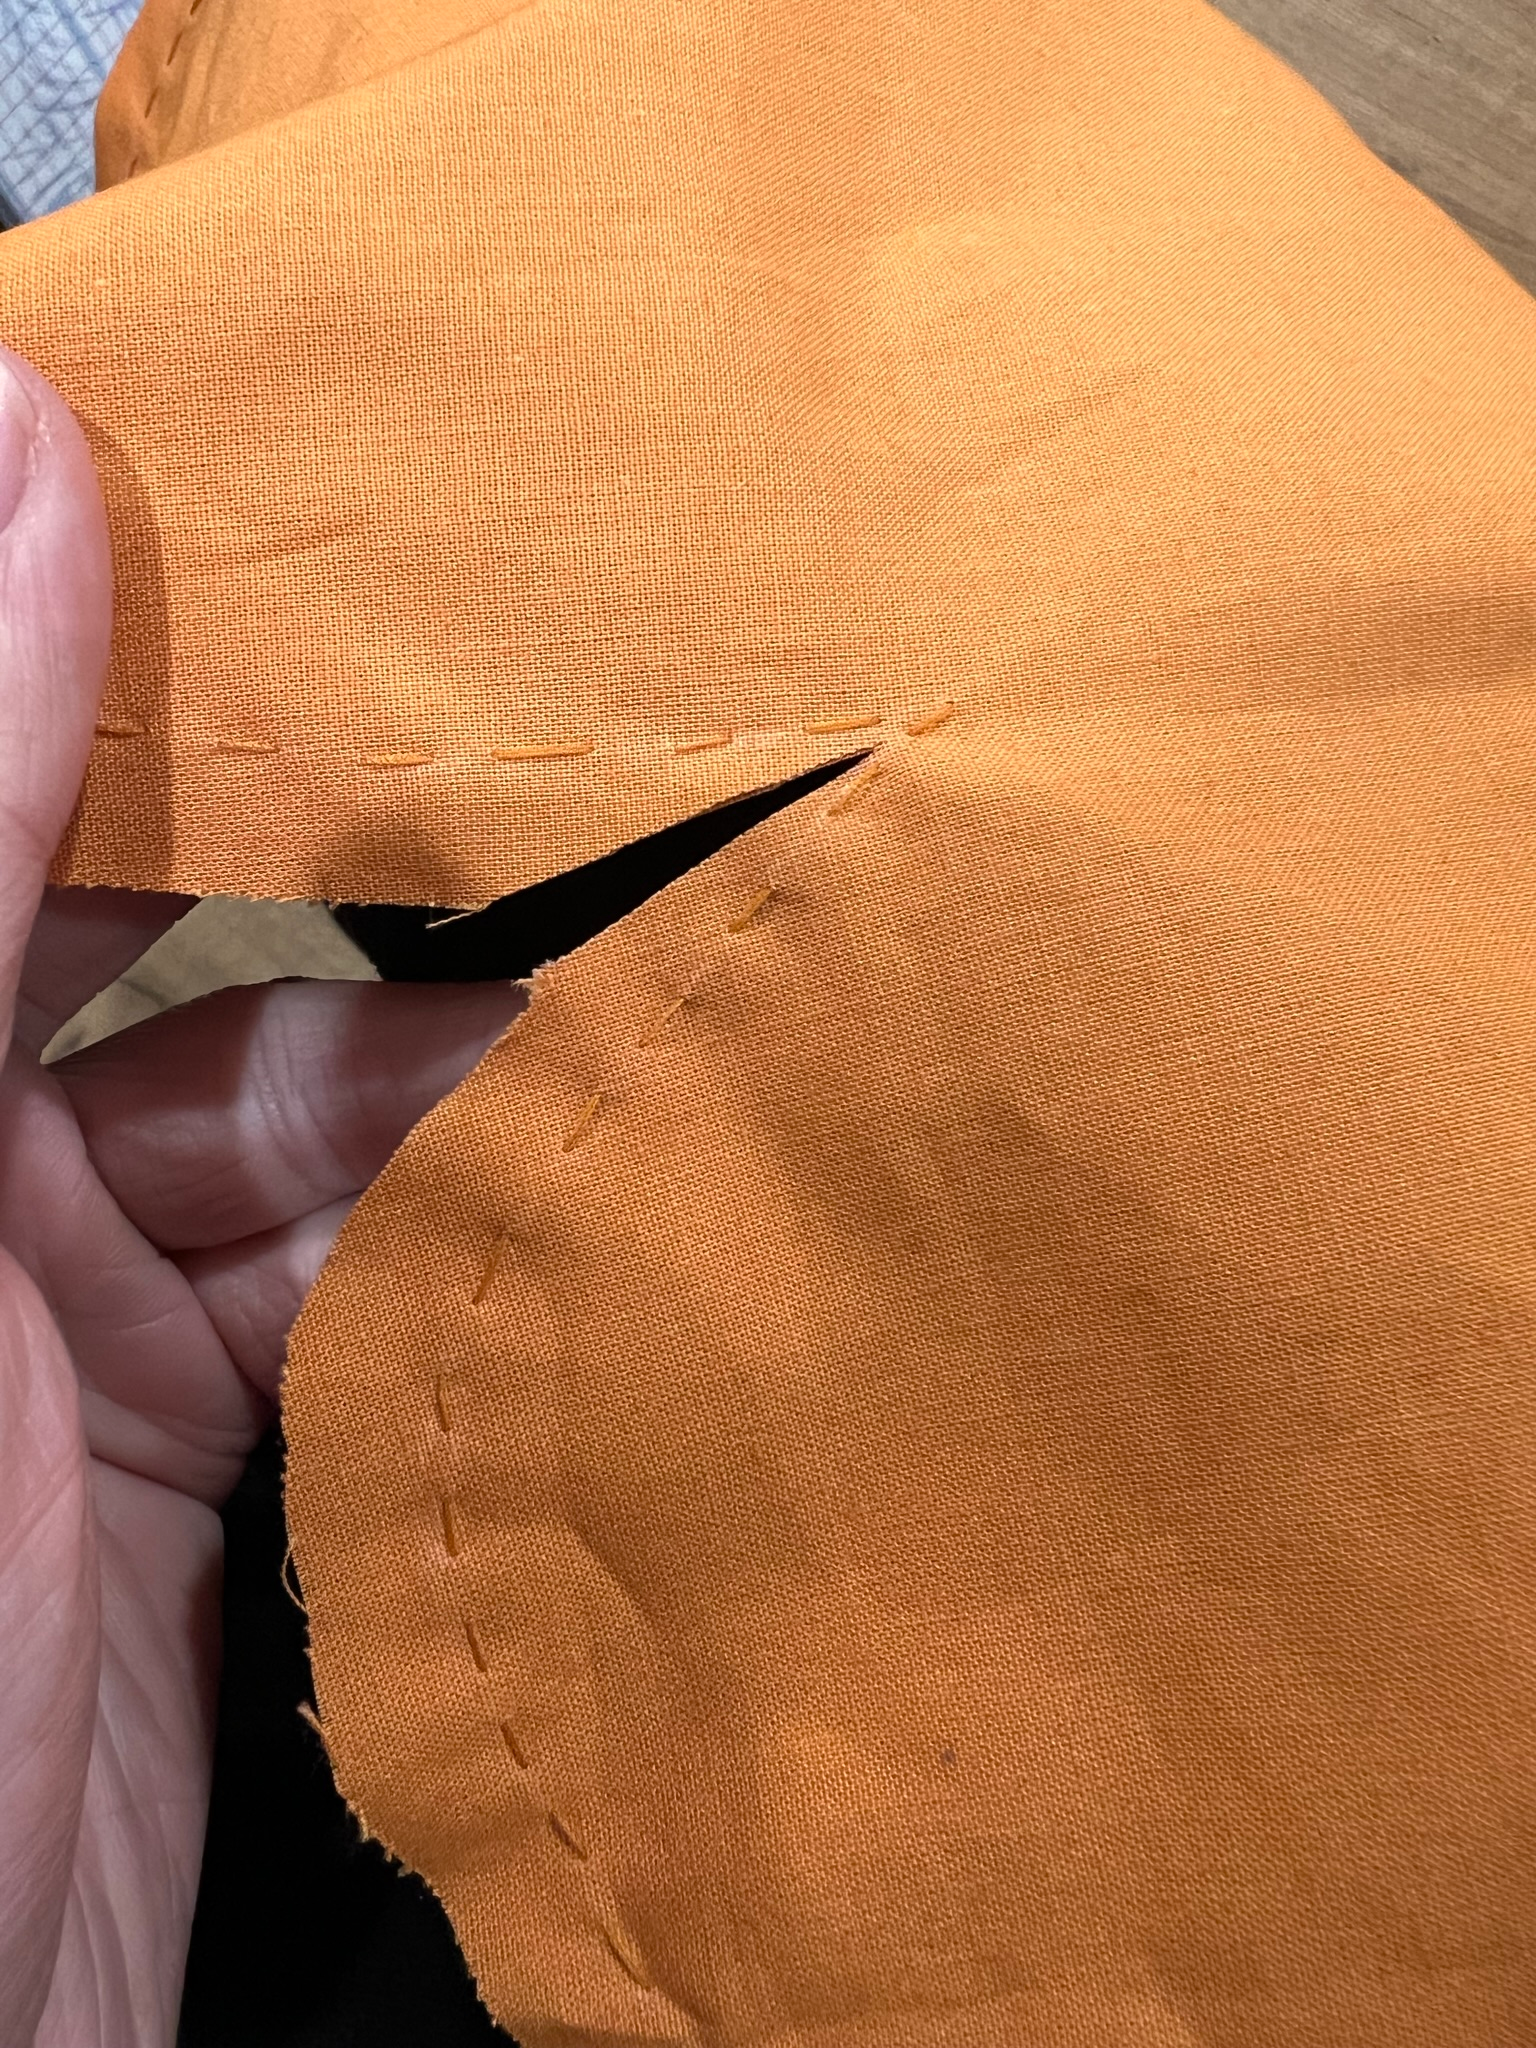
- Stitch along the border using a running stitch, leaving a ~3 inch hole (7.5 cm) that we will use to flip the pillow inside out
- Be sure to cut the fabric anywhere the design sharply changes direction as this will help preserve the intended shape after flipping the pillow inside out. Be careful not to cut the thread!
Step 5: Stuff and seal
- Flip the pillow inside out through the hole I mentioned previously.
- Insert the pillow stuffing into the opening, being sure not to tear your seams.
- Secure your seam with a ladder stitch.
- This is a new stitch that’s great for ensuring the thread stays invisible. Once the stitch is tightened, the leftover fabric in between your stitches should tuck inside the pillow, leaving a seam with near invisible threads.
- Start with your usual needle threading and knotting technique.
- Poke through the bottom of one side – you’re basically coming from inside of the pillow towards the outside, leaving the knot hidden on the inside.
- Stitch through the other side, going from the top this time.
- Use a running stitch to move your needle down the fabric, then switch through to the other side (going through the top again).
- Repeat the previous step until you’re near the end.
- To finish the stitch, tuck your needle back in through your last stitch and pull slightly, leaving a loop through which you can use to secure your stitch (this is basically the same technique I covered here)

That’s it! Hopefully you enjoy your new flower pillow or whatever other creation you might have made following these instructions. The rough gist of these instructions should apply to pretty much any basic pillow/plushie/stuffed object, so hopefully you feel empowered to start your own project! If you want some more tips from my personal experience, keep reading on.
Mistakes, Lessons Learned, and Helpful Tips
Buying Fabric: I stepped into JOANN Fabric and Crafts for the first time ever on Saturday and was totally lost. All the fabric options were on the second floor and there was a LOT to choose from. Each of the fabrics were wrapped around a cardboard box (which I later learned were called bolts). The fabric is priced per yard, and you take the bolt to the cashier who cuts it to whatever size you request.
To Glue or Not To Glue: I actually lied a little when I said I didn’t use fabric glue. While the original instructions relied on fabric glue to stick the fabric onto some batting, I instead tried using fabric glue to secure the center “circle” shape given how complex the corner geometry was. The idea was that sewing into each other corners would have been a huge pain in the butt and I also didn’t want to have the corners lifting off the main body of the pillow. Except…I glued the center pieces too low and I had to rip them off and flip the cuts over to hide the glue spots. Sewing turned out to not be that big of a pain, and I now kind of like how the corners flop a bit.
Stitch Efficiency: When I started sewing for this project, I was poking my needle through one side, flipping the piece over, then using a backlight to figure out where my fabric pieces met up to figure out where I would insert the needle from the other side. This took forever. My first big leap in efficiency came when I figured I could prod the fabric with the needle from the back – not poking all the way through and creating a hole, but enough for me to understand where it would come through if I committed. My second big leap in efficiency came when I started doing 3-4 stitches at once. This involved stacking fabric on my needle a few times before pulling the needle all the way through.
Cutting Corners: Literally. The first time I flipped my pillow inside out, I was super confused as to why the fabric was bunching up in weird places. Turns out, you need to cut the fabric any point there’s a corner, otherwise the shape won’t invert correctly. Thankfully for you all, I’ve included that step in my instructions.
Short Ladders: Save yourself time and energy by keeping the opening for your pillow inversion as small as possible. I left mine way too big (almost two petals worth), and it took me FOREVER to do the ladder stitches. Ladder stitches are hidden, but you can still kind of tell where the stitch pattern changes if you look carefully. It was also generally harder to stitch from what is essentially inside out, and my fabric chalk lines were really starting to disappear at this point.
Hopefully your experience will be made simpler through the mistakes I made! Comment down below if you’ve taken on this project and have any additional tips and tricks to share.
This was lit